Assalamualaikum,
Well to understand this post you will need to read first how i set multiple Wordpress sites in Docker containers~
 |
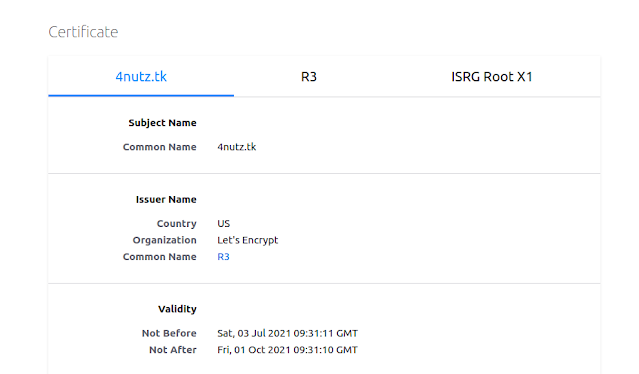
| LetsEncrypt Certification Auto Renewal |
Ok the trick that i did to automate the renewal process is
1. Create 2 separate docker file
I'm not able to create a single line letsencrypt command that can run cert renewal for two different domains, thus this is a hack way. If you have any suggestion let me know please!
ls -l wordpress/docker-compose*
-rw-rw-r-- 1 cxx cxx 2421 Jun 7 11:32 wordpress/docker-compose-4nutz.yml
-rw-rw-r-- 1 cxx cxx 2442 Jun 7 11:28 wordpress/docker-compose.yml
For file docker-compose-4nutz.yml small change made on the certbot definition, where i commented out the volumes for another website / kedaibiskut. Highlighted you can just totally remove it. Ensure the command is correct only for one domain and one path.
certbot:
depends_on:
- webserver
image: certbot/certbot
container_name: certbot
volumes:
- certbot-etc:/etc/letsencrypt
- ./data/html:/var/www/html
# - ./data/kedaibiskut:/var/www/kedaibiskut
command: certonly --webroot -w /var/www/html --email 4nutzdeli@gmail.com --agree-tos --no-eff-email --force-renewal -d 4nutz.tk -d www.4nutz.tk
Ensure the certbot definition for another site (kedai biskut) is correct too~
2. Add cron job to run the renewal cert every 3 months and restart webserver container too~
0 0 1 */3 * /usr/local/bin/docker-compose -f /home/cxx/wordpress/docker-compose.yml --verbose up --force-recreate --no-deps certbot > /home/cxx/wordpress/lets_encrypt_renewal.log 2>&1 && /usr/local/bin/docker-compose -f /home/cxx/wordpress/docker-compose-4nutz.yml --verbose up --force-recreate --no-deps certbot >> /home/cxx/wordpress/lets_encrypt_renewal.log 2>&1 && /usr/local/bin/docker-compose -f /home/cxx/wordpress/docker-compose.yml --verbose up -d --force-recreate --no-deps webserver >> /home/cxx/wordpress/lets_encrypt_renewal.log 2>&1
What does the command do?
a) 0 0 1 */3 *
run “At 00:00 on day-of-month 1 in every 3rd month.”
b) /usr/local/bin/docker-compose -f /home/cxx/wordpress/docker-compose.yml --verbose up --force-recreate --no-deps certbot > /home/cxx/wordpress/lets_encrypt_renewal.log 2>&1
run docker-compose that renew cert for kedaibiskut domain and record the standard error and output to the specified path. eg (/home/cxx/wordpress/lets_encrypt_renewal.log) , the first, i dumped to new file. next command append the output the the file. This log is for troubleshooting process. Each command we run will have output recorded to the same file.
c) &&
run the next command if the first one before "&&" is successful
d) /usr/local/bin/docker-compose -f /home/cxx/wordpress/docker-compose-4nutz.yml --verbose up --force-recreate --no-deps certbot >> /home/cxx/wordpress/lets_encrypt_renewal.log 2>&1
run docker compose to renew cert for 4nutz domain. similar to b)
notice that for b) and d) i use the full docker-compose bin path. else the cron job will have problem locating docker-compose probably due to the environment path.
e) /usr/local/bin/docker-compose -f /home/cxx/wordpress/docker-compose.yml --verbose up -d --force-recreate --no-deps webserver >> /home/cxx/wordpress/lets_encrypt_renewal.log 2>&1
restart the webserver container faster to reload the new cert omg~ let me know if this is not good practice. our website is not so critical restarting it should be fine lol!
Thats all! finally the pending task done. ! i always need some mood to do website maintenance lol! tqtq
Comments
Post a Comment