
Easily rename multiple files / image files with incremental number in Ubuntu

Why it is IMPORTANT to rename our IMAGE file names before uploading / posting to the internet world?

this is because it helps the

  • Search engine to understand what images is that or its relevant 
  • Proper naming allow keyword inclusion too instead just the image name
  • Will redirect traffic to your blog/website when user search using Google Images!

knowing that. Its very important to rename our images / files properly.

BUT WAIT, my 1 blog post can have 10 IMAGES man!

no worries, you can group related images and rename by adding the numbering at the end of it!

With ubuntu renaming its REALLY easy man!

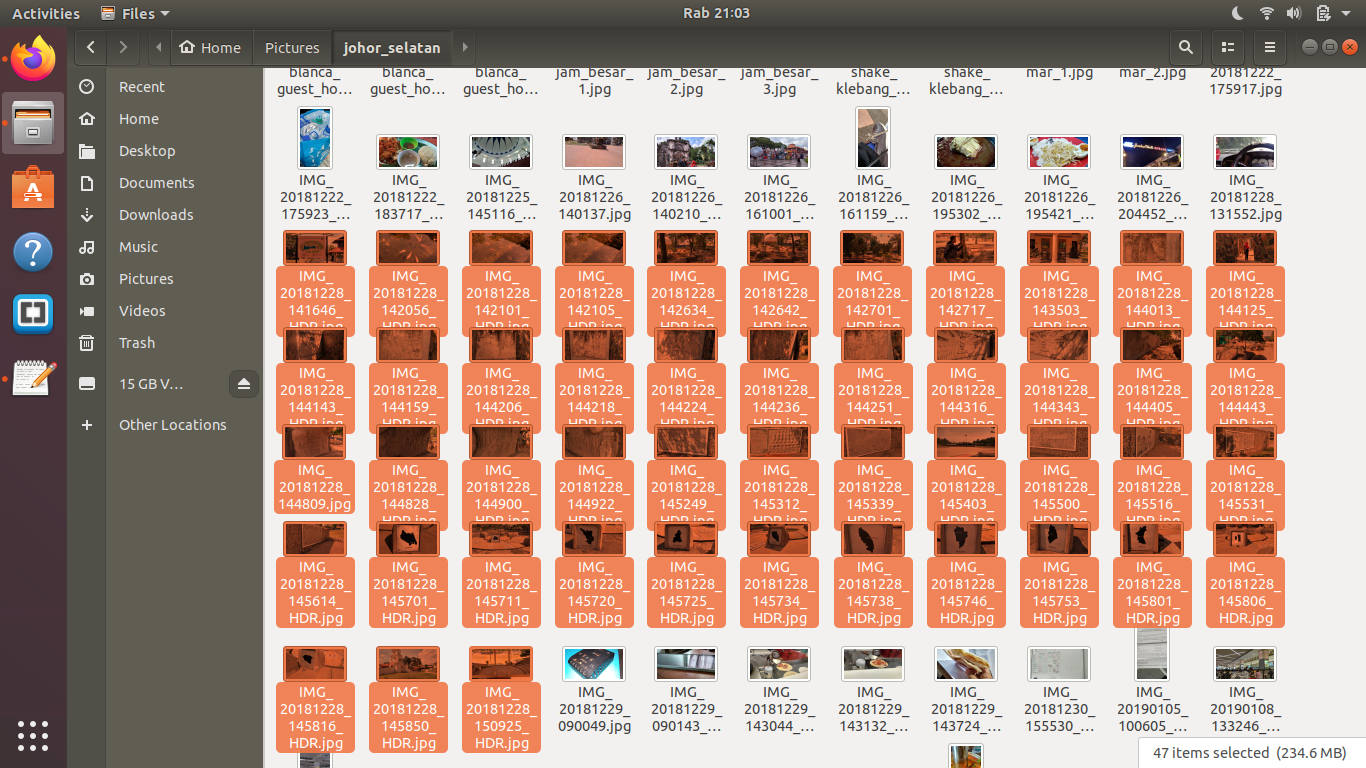
Renaming multiple files step 1 - Select the images that you are interested in

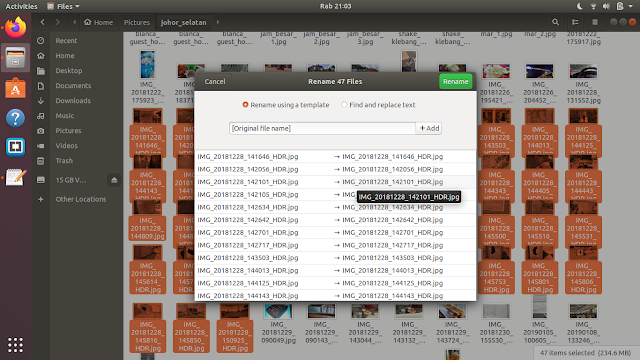
Renaming multiple files step 2 - Right click and select rename

Renaming multiple files step 3 - type in the image name, the best is to include keyword too

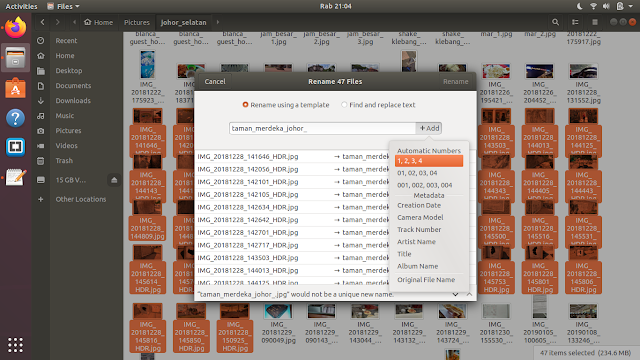
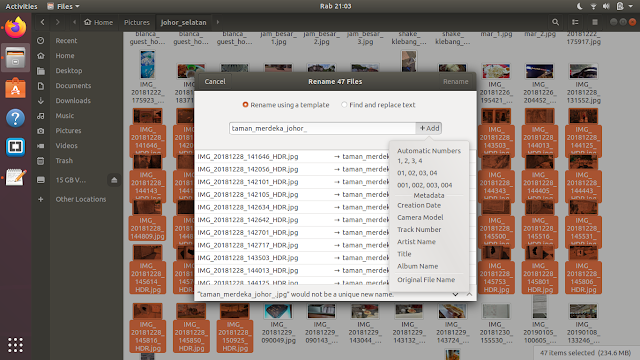
Renaming multiple files step 4 - click the add button, and select how do you want the files is differentiated; using number, camera model, track number etc~

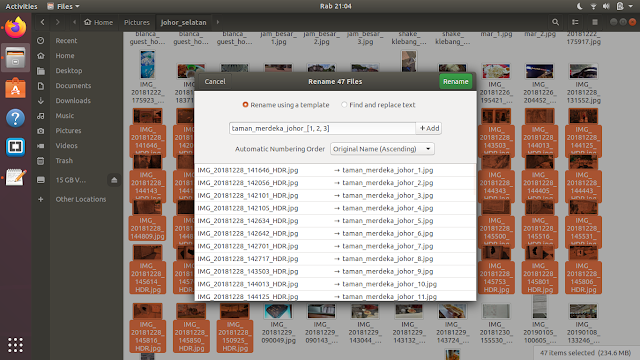
Renaming multiple files step 5 - now you are done man! done! click rename
 Wala! your files will be renamed accordingly !enjoy and start posting on net :!

Comments

  1. Easily Rename Multiple Files / Image Files With Incremental Number In Ubuntu >>>>> Download Now

    >>>>> Download Full

    Easily Rename Multiple Files / Image Files With Incremental Number In Ubuntu >>>>> Download LINK

    >>>>> Download Now

    Easily Rename Multiple Files / Image Files With Incremental Number In Ubuntu >>>>> Download Full

    >>>>> Download LINK Wz

    ReplyDelete

Post a Comment

Popular posts from this blog

C# Serialization Tutorial Part 1 : Serialize object in file stream

Hello Peeps. Came across this topic while doing our game saving data feature. this post only cover basic serialization. basically serialization help us to convert our object into stream of bytes so that our object can be stored or transmit over in memory/file/database. before we can proceed with the serialization tutorial, we need to set the user permission to our target folder path. 1. Set the folder path to be accessible and can be override. This step is to avoid our program/apps from throwing unauthorizedaccessexception.    - for my scenario, im choosing the path of D:\SelfLearning\c#\Serialization to store my data file. Right click the target folder, select on Security tab Select on Users and give full control or modify permission to the user. 2. Now we are going to write our code. First we need to setup our folder path. 3. We going to create our file.  In this tutorial we are using FileStream type, other then FileStream, we can make use of MemoryStream i

Tutorial on Min3D framework using Android Studio

Salam peeps, UPDATES***, the model on the old link is no longer working. so i have create a github repo, where i put the source code in a project, you guys can try to clone in and run on your android studio device emulator or directly on your phone, Ive replaced the model with a cube. https://github.com/aliaramli/Min3DTutorial Previously i ve posted tutorial on min3D using eclipse IDE, i believe most of us has moved to Android Studio IDE in developing android apps? As previous tutorial shows a lot of support from readers and among hot post in my blog, i ve decided to post the same tutorial but this time using Android Studio. For those who are familiar with Eclipse/Android Studio migration they might not have problem in running this tutorial . For more detail explanation on min3D please visit this website page Ok lets get started. Step One Create a new android project in android studio. you may name it as what you like, below are how i defined my project settings.

Tutorial on min3d framework

Salam all. This time I want to share a bit, how I tried out the mid3d framework for the first time. Acknowledge that I am new to android development.   I just follow the tutorial on Mat-d website but there are certain things that I don’t understand how they actually work. Thus I want to share what I did step by step to make this example work. For explanations on coding/steps or errors please visit Mat-d website here J you ll understand more …. mat-d original tutorial load a 3d obl model with min3d for android Step one . Download min3d into your eclipse . Select File>Import>SVN>Checkout projects from SVN Next. Choose radio button : Create a new repository location Next. Enter the svn location http://min3d.googlecode.com/svn/trunk the thing that we want to check out from the svn is the min3d framework code. Step two. Download obj file  www.3dvia.com …you need to register first..it has free acc version.. and download the followin